No edit summary |
Tom Sponheim (talk | contribs) |
||
| (41 intermediate revisions by 10 users not shown) | |||
| Line 1: | Line 1: | ||
| ⚫ | |||
| − | {| border="0" cellpadding="1" cellspacing="1" class="article-table article-table-selected" style="width: 500px; " |
||
| ⚫ | |||
| − | |- |
||
| ⚫ | [[Image:Windshield_shade.jpg|300px|right]][[Kathy Dahl-Bredine]] developed the '''Windshield Shade Solar Cooker''' while experimenting with various designs of cookers to introduce in the indigenous communities where Kathy lives and works in southern [[Mexico]]. She hit upon an utterly simple way to make an instant portable solar oven by using an automobile windshield shade. |
||
| − | ! scope="col"|fag |
||
| − | ! scope="col"|fag |
||
| − | |- |
||
| − | |fag |
||
| − | |fag |
||
| − | |- |
||
| − | |fag fag |
||
| − | |fag |
||
| − | |} |
||
| ⚫ | |||
| − | |||
| ⚫ | |||
| ⚫ | [[Image:Windshield_shade.jpg|300px|right]][[Kathy Dahl-Bredine]] developed the '''Windshield Shade Solar Cooker''' while experimenting with various designs of cookers to introduce in the indigenous communities where Kathy lives and works in southern [[Mexico]]. She hit upon an utterly simple way to make an instant portable solar oven by |
||
==Materials needed== |
==Materials needed== |
||
| + | *Reflective accordion-folding car sunshade |
||
| − | *Box Of Condoms XXL |
||
| − | *Black [[pot |
+ | *Black [[pot]] |
*Bucket or cardboard box |
*Bucket or cardboard box |
||
| − | *[[Oven cooking bag |
+ | *[[Oven cooking bag]] |
| − | * |
+ | *Cake rack (or wire frame or grill) (optional) |
| − | *12 |
+ | *{{CM|12}} of Velcro (optional) |
==Instructions== |
==Instructions== |
||
(Note that the windshield shade can be attached to itself by means other than Velcro.) |
(Note that the windshield shade can be attached to itself by means other than Velcro.) |
||
| − | [[Image:Windshield_shade_2.jpg|thumb|250px|right|Making the funnel]] |
+ | [[Image:Windshield_shade_2.jpg|thumb|250px|right|Making the funnel.]] |
#Lay the sunshade out with the notched side toward you, as above. |
#Lay the sunshade out with the notched side toward you, as above. |
||
| − | #Cut the Velcro into three pieces, each about 4 |
+ | #Cut the Velcro into three pieces, each about {{CM|4}} long. |
| − | #Stick one half of each piece, evenly spaced, onto the edge to the left of the notch. Attach the matching half of each piece onto the underneath size to the right of the notch, so that they fit together when the two sides are brought together to form a funnel. (I first tried sewing these on a sewing machine, but found it cut through the reflective material.) If using stick-on Velcro, you can align the two pieces easily like this: Stick down one side of the Velcro, then press the two pieces of Velcro together, fold the shade into the funnel shape and stick down the second side. |
+ | #Stick one half of each piece, evenly spaced, onto the edge to the left of the notch. Attach the matching half of each piece onto the underneath size to the right of the notch, so that they fit together when the two sides are brought together to form a funnel. (I first tried sewing these on a sewing machine, but found it cut through the reflective material.) If using stick-on Velcro, you can align the two pieces easily like this: Stick down one side of the Velcro, then press the two pieces of Velcro together, fold the shade into the funnel shape, and stick down the second side. |
| − | #Press the Velcro pieces together |
+ | #Press the Velcro pieces together and set the funnel on top of a bucket or a round or rectangular plastic wastebasket. |
| − | #Place a black pot on top of a square cake rack, placed inside a plastic baking bag. A standard size rack in the U.S. is 25 |
+ | #Place a black pot on top of a square cake rack, placed inside a plastic baking bag. A standard size cake rack in the U.S. is {{CM|25}}. This is placed inside the funnel, so that the rack rests on the top edges of the bucket or wastebasket. Since the sunshade material is soft and flexible, the rack is necessary to support the pot. It also allows the sun's rays to shine down under the pot and reflect on all sides. If such a rack is not available, a wire frame could be made to work as well. Note: The flexible material will squash down around the sides of the rack. |
See also [[Solar Funnel Cooker]]. |
See also [[Solar Funnel Cooker]]. |
||
===Tips=== |
===Tips=== |
||
| − | [[Image:Windshield_shade_3.jpg|thumb|right|250px|Cooker with stabilizing stick]] |
+ | [[Image:Windshield_shade_3.jpg|thumb|right|250px|Cooker with stabilizing stick.]] |
| − | *The |
+ | *The funnel can be tilted in the direction of the sun. |
| − | *A |
+ | *A stick placed across from one side of the funnel to the other helps to stabilize it in windy weather (see photo). |
| − | *After cooking, simply fold up your “oven” and slip the elastic bands in place for easy travel or |
+ | *After cooking, simply fold up your “oven” and slip the elastic bands in place for easy travel or storage. |
| − | Kathy Dahl-Bredine writes: "I have found this totally simple solar oven extremely practical, as it is so lightweight and easy to carry along anywhere. But in addition, it has reached a higher temperature in a shorter time than all the other models I have experimented with so far (I haven’t used a parabolic) |
+ | Kathy Dahl-Bredine writes: "I have found this totally simple solar oven extremely practical, as it is so lightweight and easy to carry along anywhere. But in addition, it has reached a higher temperature in a shorter time than all the other models I have experimented with so far (I haven’t used a parabolic) — a little above {{Degree|177}}. I have cooked black beans in about the same amount of time as on a gas stove; I’ve used it to bake breads, granola, brownies, lasagna, all sorts of vegetables, and to purify water. The sunshade may not be available everywhere, but I suspect it can be found in most urban areas, since I found it here in southern Mexico. The Velcro was also available in fabric stores. The cost of the sunshade was about USD 3.00; the Velcro about 25 cents." |
[[File:Dufresne_windshield_cooker_support,_11-4-13.jpg|thumb|250px|[[Steven Dufresne]] offers the suggestion to clip a perimeter wire support around the cooker for reflector support.]] |
[[File:Dufresne_windshield_cooker_support,_11-4-13.jpg|thumb|250px|[[Steven Dufresne]] offers the suggestion to clip a perimeter wire support around the cooker for reflector support.]] |
||
| − | It is clear that the windshield |
+ | It is clear that the windshield-style cooker is somewhat flimsy in any sort of windy conditions. One approach is to tie a horizontal support brace across the front of the cooker. This is often done with something like an untwisted metal coat hanger. A perimeter wire can also be used, held with stationary clips, as seen in the adjoining photo.{{clr}} |
| − | |||
| − | {{clr}} |
||
| − | |||
| − | |||
| − | Edit SummaryPreview |
||
| − | |||
| − | ===<span style="border-bottom-width:0px;border-left-width:0px;font-style:inherit;font-weight:inherit;margin-top:0px;margin-right:0px;margin-bottom:0px;margin-left:0px;padding-top:0px;padding-right:0px;padding-bottom:0px;padding-left:0px;vertical-align:baseline;float:left;">Add features and media</span>=== |
||
| − | <span style="border-bottom-width:0px;border-left-width:0px;font-style:inherit;font-weight:inherit;margin-top:0px;margin-right:0px;margin-bottom:0px;margin-left:0px;padding-top:0px;padding-right:0px;padding-bottom:0px;padding-left:0px;vertical-align:baseline;zoom:1;"><span class="RTEImageButton" style="border-bottom-width:0px;border-left-width:0px;font-style:inherit;font-weight:inherit;margin-top:5px;margin-right:0px;margin-bottom:4px;margin-left:5px;padding-top:0px;padding-right:0px;padding-bottom:0px;padding-left:0px;vertical-align:baseline;display:inline-block;"><span style="border-bottom-width:0px;border-left-width:0px;font-style:inherit;font-weight:inherit;margin-top:3px;margin-right:1px;margin-bottom:3px;margin-left:1px;padding-top:0px;padding-right:0px;padding-bottom:0px;padding-left:0px;vertical-align:baseline;background-color:transparent;background-image:url(http://slot1.images.wikia.nocookie.net/__cb1398258743/common/extensions/wikia/EditPageLayout/images/sprite-edit-page.png);display:inline-block;height:32px;width:48px;background-position:-939.5px5.5px;background-repeat:no-repeatno-repeat;"> </span><span id="uielem_1_label" style="border-bottom-width:0px;border-left-width:0px;font-style:inherit;font-weight:inherit;margin-top:0px;margin-right:0px;margin-bottom:0px;margin-left:0px;padding-top:0px;padding-right:0px;padding-bottom:0px;padding-left:0px;vertical-align:baseline;color:rgb(58,58,58);display:block;cursor:inherit;font-size:10px;white-space:nowrap;height:auto;line-height:normal;float:none;bottom:0px;left:0px;overflow-x:hidden;overflow-y:hidden;position:absolute;text-align:center;width:51px;">Photo</span></span><span class="RTEGalleryButton" style="border-bottom-width:0px;border-left-width:0px;font-style:inherit;font-weight:inherit;margin-top:5px;margin-right:0px;margin-bottom:4px;margin-left:5px;padding-top:0px;padding-right:0px;padding-bottom:0px;padding-left:0px;vertical-align:baseline;display:inline-block;"><span style="border-bottom-width:0px;border-left-width:0px;font-style:inherit;font-weight:inherit;margin-top:3px;margin-right:1px;margin-bottom:3px;margin-left:1px;padding-top:0px;padding-right:0px;padding-bottom:0px;padding-left:0px;vertical-align:baseline;background-color:transparent;background-image:url(http://slot1.images.wikia.nocookie.net/__cb1398258743/common/extensions/wikia/EditPageLayout/images/sprite-edit-page.png);display:inline-block;height:32px;width:48px;background-position:-531px0px;background-repeat:no-repeatno-repeat;"> </span><span id="uielem_2_label" style="border-bottom-width:0px;border-left-width:0px;font-style:inherit;font-weight:inherit;margin-top:0px;margin-right:0px;margin-bottom:0px;margin-left:0px;padding-top:0px;padding-right:0px;padding-bottom:0px;padding-left:0px;vertical-align:baseline;color:rgb(58,58,58);display:block;cursor:inherit;font-size:10px;white-space:nowrap;height:auto;line-height:normal;float:none;bottom:0px;left:0px;overflow-x:hidden;overflow-y:hidden;position:absolute;text-align:center;width:51px;">Gallery</span></span><span class="RTESlideshowButton" style="border-bottom-width:0px;border-left-width:0px;font-style:inherit;font-weight:inherit;margin-top:5px;margin-right:0px;margin-bottom:4px;margin-left:5px;padding-top:0px;padding-right:0px;padding-bottom:0px;padding-left:0px;vertical-align:baseline;display:inline-block;"><span style="border-bottom-width:0px;border-left-width:0px;font-style:inherit;font-weight:inherit;margin-top:3px;margin-right:1px;margin-bottom:3px;margin-left:1px;padding-top:0px;padding-right:0px;padding-bottom:0px;padding-left:0px;vertical-align:baseline;background-color:transparent;background-image:url(http://slot1.images.wikia.nocookie.net/__cb1398258743/common/extensions/wikia/EditPageLayout/images/sprite-edit-page.png);display:inline-block;height:32px;width:48px;background-position:-1334.5px0px;background-repeat:no-repeatno-repeat;"> </span><span id="uielem_3_label" style="border-bottom-width:0px;border-left-width:0px;font-style:inherit;font-weight:inherit;margin-top:0px;margin-right:0px;margin-bottom:0px;margin-left:0px;padding-top:0px;padding-right:0px;padding-bottom:0px;padding-left:0px;vertical-align:baseline;color:rgb(58,58,58);display:block;cursor:inherit;font-size:10px;white-space:nowrap;height:auto;line-height:normal;float:none;bottom:0px;left:0px;overflow-x:hidden;overflow-y:hidden;position:absolute;text-align:center;width:51px;">Slideshow</span></span><span class="RTESliderButton" style="border-bottom-width:0px;border-left-width:0px;font-style:inherit;font-weight:inherit;margin-top:5px;margin-right:0px;margin-bottom:4px;margin-left:5px;padding-top:0px;padding-right:0px;padding-bottom:0px;padding-left:0px;vertical-align:baseline;display:inline-block;"><span style="border-bottom-width:0px;border-left-width:0px;font-style:inherit;font-weight:inherit;margin-top:3px;margin-right:1px;margin-bottom:3px;margin-left:1px;padding-top:0px;padding-right:0px;padding-bottom:0px;padding-left:0px;vertical-align:baseline;background-color:transparent;background-image:url(http://slot1.images.wikia.nocookie.net/__cb1398258743/common/extensions/wikia/EditPageLayout/images/sprite-edit-page.png);display:inline-block;height:32px;width:48px;background-position:-1280.5px2.5px;background-repeat:no-repeatno-repeat;"> </span><span id="uielem_4_label" style="border-bottom-width:0px;border-left-width:0px;font-style:inherit;font-weight:inherit;margin-top:0px;margin-right:0px;margin-bottom:0px;margin-left:0px;padding-top:0px;padding-right:0px;padding-bottom:0px;padding-left:0px;vertical-align:baseline;color:rgb(58,58,58);display:block;cursor:inherit;font-size:10px;white-space:nowrap;height:auto;line-height:normal;float:none;bottom:0px;left:0px;overflow-x:hidden;overflow-y:hidden;position:absolute;text-align:center;width:51px;">Slider</span></span><span class="RTEVideoButton" style="border-bottom-width:0px;border-left-width:0px;font-style:inherit;font-weight:inherit;margin-top:5px;margin-right:0px;margin-bottom:4px;margin-left:5px;padding-top:0px;padding-right:0px;padding-bottom:0px;padding-left:0px;vertical-align:baseline;display:inline-block;"><span style="border-bottom-width:0px;border-left-width:0px;font-style:inherit;font-weight:inherit;margin-top:3px;margin-right:1px;margin-bottom:3px;margin-left:1px;padding-top:0px;padding-right:0px;padding-bottom:0px;padding-left:0px;vertical-align:baseline;background-color:transparent;background-image:url(http://slot1.images.wikia.nocookie.net/__cb1398258743/common/extensions/wikia/EditPageLayout/images/sprite-edit-page.png);display:inline-block;height:32px;width:48px;background-position:-1702px1px;background-repeat:no-repeatno-repeat;"> </span><span id="uielem_5_label" style="border-bottom-width:0px;border-left-width:0px;font-style:inherit;font-weight:inherit;margin-top:0px;margin-right:0px;margin-bottom:0px;margin-left:0px;padding-top:0px;padding-right:0px;padding-bottom:0px;padding-left:0px;vertical-align:baseline;color:rgb(58,58,58);display:block;cursor:inherit;font-size:10px;white-space:nowrap;height:auto;line-height:normal;float:none;bottom:0px;left:0px;overflow-x:hidden;overflow-y:hidden;position:absolute;text-align:center;width:51px;">Video</span></span><span style="border-bottom-width:0px;border-left-width:0px;font-style:inherit;font-weight:inherit;margin-top:5px;margin-right:0px;margin-bottom:4px;margin-left:5px;padding-top:0px;padding-right:0px;padding-bottom:0px;padding-left:0px;vertical-align:baseline;display:inline-block;"><span style="border-bottom-width:0px;border-left-width:0px;font-style:inherit;font-weight:inherit;margin-top:3px;margin-right:1px;margin-bottom:3px;margin-left:1px;padding-top:0px;padding-right:0px;padding-bottom:0px;padding-left:0px;vertical-align:baseline;background-color:transparent;background-image:url(http://slot1.images.wikia.nocookie.net/__cb1398258743/common/extensions/wikia/EditPageLayout/images/sprite-edit-page.png);display:inline-block;height:32px;width:48px;background-position:-1478.5px3.5px;background-repeat:no-repeatno-repeat;"> </span><span id="cke_20_label" style="border-bottom-width:0px;border-left-width:0px;font-style:inherit;font-weight:inherit;margin-top:0px;margin-right:0px;margin-bottom:0px;margin-left:0px;padding-top:0px;padding-right:0px;padding-bottom:0px;padding-left:0px;vertical-align:baseline;color:rgb(58,58,58);display:block;cursor:inherit;font-size:10px;white-space:nowrap;height:auto;line-height:normal;float:none;bottom:0px;left:0px;overflow-x:hidden;overflow-y:hidden;position:absolute;text-align:center;width:51px;">Table</span></span></span> |
||
| − | ===<span style="border-bottom-width:0px;border-left-width:0px;font-style:inherit;font-weight:inherit;margin-top:0px;margin-right:0px;margin-bottom:0px;margin-left:0px;padding-top:0px;padding-right:0px;padding-bottom:0px;padding-left:0px;vertical-align:baseline;float:left;">Categories</span>=== |
||
| − | |||
| − | |||
| − | ===<span style="border-bottom-width:0px;border-left-width:0px;font-style:inherit;font-weight:inherit;margin-top:0px;margin-right:0px;margin-bottom:0px;margin-left:0px;padding-top:0px;padding-right:0px;padding-bottom:0px;padding-left:0px;vertical-align:baseline;float:left;">Templates</span>=== |
||
| − | <p style="border-bottom-width:0px;border-left-width:0px;font-style:inherit;font-weight:inherit;margin-top:0px;margin-right:0px;margin-bottom:0px;margin-left:0px;padding-top:0px;padding-right:0px;padding-bottom:0px;padding-left:55px;vertical-align:baseline;color:rgb(96,96,96);font-size:9px;line-height:18px;position:relative;">Contributions licensed as CC-BY-SA. [http://community.wikia.com/wiki/Community_Central:Licensing More details.]</p> |
||
| − | <span class="RTEMediaOverlayEdit" style="border-bottom-width:0px;border-left-width:0px;font-style:inherit;font-weight:inherit;margin-top:0px;margin-right:0px;margin-bottom:0px;margin-left:0px;padding-top:0px;padding-right:3px;padding-bottom:0px;padding-left:3px;vertical-align:baseline;cursor:pointer;">modify</span><span class="RTEMediaOverlayDelete" style="border-bottom-width:0px;border-left-width:0px;font-style:inherit;font-weight:inherit;margin-top:0px;margin-right:0px;margin-bottom:0px;margin-left:0px;padding-top:0px;padding-right:3px;padding-bottom:0px;padding-left:3px;vertical-align:baseline;cursor:pointer;">remove</span>Steven Dufresne |
||
==Variations== |
==Variations== |
||
==="Super-size" variation=== |
==="Super-size" variation=== |
||
| − | [[Image:Car_and_truck_size_windshield_shade_cookers.jpg|thumb|right|Size comparison between car windshield shade cooker and the super-size version.]][[Sharon Cousins]] has come up with a super-size version made from a windshield shade cover sized for a large pickup truck or SUV. The larger size requires something on the order of a tub instead of a bucket for support. The 48 |
+ | [[Image:Car_and_truck_size_windshield_shade_cookers.jpg|thumb|right|Size comparison between car windshield shade cooker and the super-size version.]][[Sharon Cousins]] has come up with a super-size version made from a windshield shade cover sized for a large pickup truck or sport utility vehicle (SUV). The larger size requires something on the order of a tub instead of a bucket for support. The {{CM|48}} round grate from a broken fan helps hold the windshield shade in the tub and helps maintain the shape. Pots rest on a flat grate laid across the edges of the round grate, which lets a lot of light get under the food. [[Image:Super-size_windshield_shade_cooker.jpg|thumb|left|250px|Close-up of Sharon Cousins's supersize windshield shade cooker showing details of double grate system. Since this photo, Sharon has realized it works just as well to slip the bag over the top and sides of the water boiler, which is much easier than trying to insert the boiler into the bag. Very little heat is lost through the bottom. Just slide it over the top and sides and tuck a bit at the bottom.]] This cooker is vulnerable to wind, so put some weight (such as a large rock or two or three) in the tub, and if it is very windy you can also put a few foiled rocks on the grates to help hold it all down. This super-size version can handle up to two gallons of food or up to ten pounds of meat in decent sun. In really good sun, it has gotten a full two-gallon water boiler hot enough for dishwashing (too hot to put a bare hand in) in less than an hour. This cooker gets almost hot enough to sauté and will get smaller amounts of food very hot, very quickly. In one soup stock cooking adventure at the height of summer 2007, a one liter (0.3 gal.) cooking jar stuffed with the bones and skin of a roast chicken, some seasonings, and water with a little wine to fill was set to cook on a glass plate under a glass cover. The contents reached a good boil and fat from the top began boiling over and out of the jar, where it not only continued to boil and bubble on the glass plate under the cover, but also bubbled on the plate ''outside'' of the glass cover where it was seeping under the edge! NOTE: The double-grate system will work with a smaller shade, too — usually around {{CM|33}} to {{CM|36}} in diameter is about right for the broken fan grate. (Broken fans are not hard to come by, at least in the developed world.) Double-grating probably gives more benefits to those suncooking in the north than it would closer to the equator, though even close to the equator it will help to cook with early and late sun. |
===Steel bowl variation=== |
===Steel bowl variation=== |
||
| − | [[Image:Steel_bowl_cooker.jpg|thumb|none|333px|Inside this cooker is a Pyrex |
+ | [[Image:Steel_bowl_cooker.jpg|thumb|none|333px|Inside this cooker is a Pyrex pie plate on a short candle stand; a Pyrex bowl is on top. More info: http://arnies-solarcooking.blogspot.com/2008/06/steel-bowl-cooker_22.html]] |
| ⚫ | |||
| − | |||
| ⚫ | |||
See also [[Aluminum Roasting Pan Solar Cooker]]. |
See also [[Aluminum Roasting Pan Solar Cooker]]. |
||
===Two steel bowl variation=== |
===Two steel bowl variation=== |
||
| ⚫ | |||
| − | [[Image:Two_Steel_Bowl_cooker.jpg|none|400px]] |
||
| − | |||
| − | The picture above was my first attempt using an 1.024 mm (18 gauge) stainless steel mixing bowl and a windshield shade. |
||
| − | I used the buckets (weighted with rocks inside) to hold the shade around the bowl. |
||
| − | I could get water temperatures up to 150F, but not much higher. |
||
| − | I bought the bowl at a restaurant supply house in my home town. |
||
| − | |||
| − | I struggled for a month to find some way to attach the shade to the bowl... eventually I thought |
||
| − | I need something the same shape as the bowl to easily hold it in place, hence, the second mixing bowl. |
||
| − | |||
| − | I used silver 'pinch' style paper clips to hold the ends of the shade onto the bottom bowl, and at the back |
||
| − | where the rear view mirro depression was to help the shade conform more to the bowls. |
||
| − | |||
| − | With this design, I have been able to get 237 mL (2 cups) of water to a boil within an hour. Larger amounts of |
||
| − | soup- with broth, vegetables and meat- will get to 93 °C (200 °F) easily. |
||
| − | |||
| − | I have more photos of this cooker at [http://arnies-solarcooking.blogspot.com/ my blog]. |
||
| ⚫ | |||
| − | I live in The Middle of Nowhere, Texas (San Angelo) |
||
| − | Lat: 31.38 Lon: -100.5 Elev: 1916 |
||
===UltraLightCooker variation=== |
===UltraLightCooker variation=== |
||
| Line 100: | Line 54: | ||
[[Image:UltraLightCooker-1.jpg|right|200px]] |
[[Image:UltraLightCooker-1.jpg|right|200px]] |
||
| − | The [[UltraLightCooker]] uses foam panels for support |
+ | The [[UltraLightCooker]] uses foam panels for support and was designed by [[Andrew Kotowski]]. He built this cooker specifically for his trip to [[Poland]]. The objective was to build a simple cooker: collapsible, light, cheap, and easy to carry. It is useful for demonstrations and to cook simple meals. |
| − | Materials used: |
+ | Materials used: Car sunshade and plate of polystyrene ({{CM|1.5}} thick).<br /> |
| − | Weight: 0.5 |
+ | Weight: {{KG|0.5}} (no recipient). |
See {{GoogleLinkFromFrench|http://fr.solarcooking.wikia.com/wiki/UltraLightCooker|more information on this variation on the French Wiki}}. |
See {{GoogleLinkFromFrench|http://fr.solarcooking.wikia.com/wiki/UltraLightCooker|more information on this variation on the French Wiki}}. |
||
| Line 118: | Line 72: | ||
===Kettle Cooker variation=== |
===Kettle Cooker variation=== |
||
| − | [[Image:Kettle_catches_early_rays.jpg|thumb|300px| Converted kettle grill cooker meets the sun for the first time]] |
+ | [[Image:Kettle_catches_early_rays.jpg|thumb|300px| Converted kettle grill cooker meets the sun for the first time.]] |
[[Image:Kettle_cooker_top_view.jpg|thumb|300px| View of top of kettle cooker.]] |
[[Image:Kettle_cooker_top_view.jpg|thumb|300px| View of top of kettle cooker.]] |
||
| − | [[Sharon Cousins]] built this powerful cooker from an old kettle grill. The addition of windshield shade reflector at the back makes it a very strong cooker. On its maiden flight, temperatures in the cast |
+ | [[Sharon Cousins]] built this powerful cooker from an old kettle grill. The addition of a windshield shade reflector at the back makes it a very strong cooker. On its maiden flight, temperatures in the cast-iron fry pan under the glass lid reached {{Degree|107}} by 8:30 a.m., {{Degree|121}} by 8:45 a.m., and by midafternoon it was running just shy of {{Degree|163}}. The tilt angle of the reflector can be adjusted to keep the hot spot over the pan. This is a very good cooker for demos, as it can turn out a hot quesadilla or pan of nachos in under ten minutes (slip black plates or shallow pans of nachos into the '''pre-heated''' cast-iron fry pan — use an upside down Pyrex pie pan or bowl for a lid if your glass lid is too shallow for a pile of nachos). |
| − | A disposable aluminum pie pan is used to close the hole in the bottom of the kettle and the rest of the kettle is lined with heavy-duty aluminum foil. The fry pan rests on the grill that formerly held the charcoal and is covered with a glass lid from a thrift shop. The top of this kettle is covered with a [http://www.webstaurantstore.com/24-x-30-plastic-cooking-bag-100-bx/612PB2430.html |
+ | A disposable aluminum pie pan is used to close the hole in the bottom of the kettle, and the rest of the kettle is lined with heavy-duty aluminum foil. The fry pan rests on the grill that formerly held the charcoal and is covered with a glass lid from a thrift shop. The top of this kettle is covered with a [http://www.webstaurantstore.com/24-x-30-plastic-cooking-bag-100-bx/612PB2430.html {{CM|61}} x {{CM|76}} oven bag], available from restaurant supply stores that carry specialty bags such as the [http://www.webstaurantstore.com/third1239/products/specialty-bags.html Webstaurant Store]. It is laid flat, so it is actually a double cover, and held on with binder clips. As shown, the cast-iron pan with glass lid gets very hot, but the ambient air temperature in the kettle is not tremendously hot, so any clear plastic might be worth a try if you do not have access to an extra-large oven bag; or you could cut open two turkey-size bags to get large flat pieces and cross them over the opening, which might work depending on the size of your kettle. Sturdy spring clamps are used to secure the windshield shade and adjust the angle. If you still have the metal cover to your kettle grill and you are in the time of year when you use your kettle cooker almost daily, you can cover your cooker (at least if you used small binder clips, which do not interfere) and leave it out without having to end up with dew residue and excess dust clouding your cooker top. In the morning, just take off the cover, clip on the booster, and let your pan start heating. To perform well, the cast iron must be preheated, so if you're going to use it, the sooner you start it heating the better. |
| − | Part of what makes this arrangement so hot is the thermal mass of the cast iron. One attempt to bake bread in it indicates that lighter pans would need to be oven-bagged or otherwise greenhoused in addition to the clear cover on top of the kettle. Sharon believes that this cooker will cook in alternative pans, but only with an additional greenhouse around the pan. This is a case where cast iron gives vastly superior performance, but only if it is '''well |
+ | Part of what makes this arrangement so hot is the thermal mass of the cast iron. One attempt to bake bread in it indicates that lighter pans would need to be oven-bagged or otherwise "greenhoused," in addition to the clear cover on top of the kettle. Sharon believes that this cooker will cook in alternative pans, but only with an additional greenhouse around the pan. This is a case where cast iron gives vastly superior performance, but only if it is '''well preheated'''. |
| − | Sharon has since switched to the poster-board |
+ | Sharon has since switched to the poster-board reflector panels (See [[Aluminum Roasting Pan Solar Cooker]] and click on the project sheet link for information on making these powerful reflectors) and is reaching temperatures up to {{Degree|204}} in the glass-lidded fry pan. This has turned into a terrific cooker for quesadillas, among other things. Sharon is planning to give this cooker its own wiki page as soon as she can make a little more time for it. This jury-rig or makeshift cooker is really a prototype for something that could be groundbreaking, and Sharon would welcome contact and feedback from other solar cooking engineers and innovators on how to maximize its potential. |
===Armando Herculano variations=== |
===Armando Herculano variations=== |
||
| − | [[Image:Armando_Herculano_cookers_2007.jpg|thumb|none|480px|Other designs using windshield shades by [[Armando Herculano]] in Portugal]] |
+ | [[Image:Armando_Herculano_cookers_2007.jpg|thumb|none|480px|Other designs using windshield shades by [[Armando Herculano]] in Portugal.]] |
===HVAC insulation variation: 1=== |
===HVAC insulation variation: 1=== |
||
| − | + | Stacy Ryerson has made a cooker using a material similar to the windshield screens. It is a quilted insulating plastic covered with Mylar (sold on a roll and intended for wrapping heat ducts). However, it differs from the typical windshield screen because it is designed to bend in only one direction. This means it appears to stand vertically on its own without support, except for lateral wind bracing. The windshield screen must bend in two directions to conform with the complex shape of the glass. This allows it to form a funnel shape cooker, but the cooker usually requires additional support aids. This cooker is sturdy and is able to pack flat for transport. The back cardboard panel is ''shingled'' with strips of duct tape to make it [[waterproofing|waterproof]]. |
|
<table><tr><td>[[File:Ryerson_HVAC_insul._cooker_front,_6-28-11.jpg|300px|thumb|HVAC insulation material is sturdy and supports itself.]]</td><td>[[File:Ryerson_HVAC_insul._cooker,_rear,_6-28-11.jpg|300px|thumb|The cooker still needs to be braced in windy conditions.]]</td></tr></table> |
<table><tr><td>[[File:Ryerson_HVAC_insul._cooker_front,_6-28-11.jpg|300px|thumb|HVAC insulation material is sturdy and supports itself.]]</td><td>[[File:Ryerson_HVAC_insul._cooker,_rear,_6-28-11.jpg|300px|thumb|The cooker still needs to be braced in windy conditions.]]</td></tr></table> |
||
===HVAC insulation variation: 2=== |
===HVAC insulation variation: 2=== |
||
| − | [[Solar Cooker at Cantina West]] offers another inexpensive design possibility using reflective HVAC insulation. The Reflectix bubble insulation can be purchased in a roll |
+ | [[Solar Cooker at Cantina West]] offers another inexpensive design possibility using reflective HVAC insulation. The Reflectix bubble insulation can be purchased in a roll (7.5 m x 0.5 m, or 25 ft x 2 ft), allowing you to make several reflective panels; or you can buy a pre-cut length in some home improvement stores. This particular reflector panel is a 1 m x 1.5 m (3 ft x 2 ft) panel. The flat sheet first has a tab cut at the base, which is folded up. The adjacent bottom tabs then fold underneath. The tabs can be secured with various clips available at office supply stores. The edges of the cooker can be covered with reflective tape. A dark-colored pot enclosed in an oven roasting plastic bag sets in the center for cooking. For better heating, it is best to raise the pot up off the reflector with a trivet or small stones or sticks. [http://www.solarcooker-at-cantinawest.com/build_a_simple_solar_cooker.html See more detailed instructions...] |
<table><tr><td>[[File:Catina_West_Reflectix_cooker_1.jpg|250px|thumb|A simple tab is cut at the base of a flat sheet of insulation.]]</td><td>[[File:Cantinia_West_Reflectix_cooker_2.jpg|250px|thumb|The tabs at the bottom are folded under each other and clipped together.]]</td></tr></table> |
<table><tr><td>[[File:Catina_West_Reflectix_cooker_1.jpg|250px|thumb|A simple tab is cut at the base of a flat sheet of insulation.]]</td><td>[[File:Cantinia_West_Reflectix_cooker_2.jpg|250px|thumb|The tabs at the bottom are folded under each other and clipped together.]]</td></tr></table> |
||
| Line 145: | Line 99: | ||
===Wheelbarrow variation=== |
===Wheelbarrow variation=== |
||
| − | <table><tr><td>[[File:Wheelbarrow windshield2.jpg|thumb|Windshield shield cooker made mobile with a wheelbarrow|none|300px]]</td><td>[[File:Wheelbarrow windshield1.jpg||thumb|Food cooking in the mobile windshield wheelbarrow cooker|none|300px]]</td></tr></table> |
+ | <table><tr><td>[[File:Wheelbarrow windshield2.jpg|thumb|Windshield shield cooker made mobile with a wheelbarrow.|none|300px]]</td><td>[[File:Wheelbarrow windshield1.jpg||thumb|Food cooking in the mobile windshield wheelbarrow cooker.|none|300px]]</td></tr></table> |
| + | |||
| + | ===Camping chair variation=== |
||
| + | *{{NewMay17}}'''May 2017:''' Your folding camp chair can be used for cooking. Spread windshield shades across the chair as shown in the photo. |
||
| + | [[File:Chair_base_windshield_cooker,_5-31-17.jpg|thumb|none|350px|Camping chair support for reflector.]] |
||
| + | |||
| + | ==Audio and video== |
||
| + | *{{NewMar15}}'''February 2015''' |
||
| + | ::[[File:12TH FEB DD NEWS METRO SCAN MUMBAI.|thumb|none|500 px|News story four minutes into the video showing the thousands of students solar cooking at the Suryakumbha event.]] |
||
| + | |||
| + | *'''January 2013:''' |
||
| + | ::[[File:Suryakumbha|thumb|none|500px|On 19 January 2013, 2,044 children from 107 schools participated in this historical event wherein, trained by 206 trainers and 45 supervisors, they built their own solar ovens and cooked {{KG|400}} of Sabudana Khichadi in it. This is the video summary of the same.]] |
||
==See also== |
==See also== |
||
*'''July 2006:''' [[Media:Kathy_dahl1.pdf|Technical Data Sheet]] - ''Kathy Dahl'' |
*'''July 2006:''' [[Media:Kathy_dahl1.pdf|Technical Data Sheet]] - ''Kathy Dahl'' |
||
| − | *[[Haines |
+ | *[[Haines Solar Cooker]] |
* http://texascook.blogspot.com/2008/06/windshield-chicken.html |
* http://texascook.blogspot.com/2008/06/windshield-chicken.html |
||
*[http://solarcooking.org/phpBB2/viewtopic.php?t=172&highlight Simple solar roaster pan cooking photos] |
*[http://solarcooking.org/phpBB2/viewtopic.php?t=172&highlight Simple solar roaster pan cooking photos] |
||
| + | {{InterwikiLinks|Cuiseurs solaires en pare-soleil}} |
||
| − | ==External links== |
||
| − | *[http://www.terra.org/cocinas/fichaen.php?id=25 The Terra Foundation's data sheet on this cooker] |
||
| − | |||
| − | {{InterwikiLinks|Pare-brise ombre cuiseur solaire}} |
||
[[Category:Solar cooker designs]] |
[[Category:Solar cooker designs]] |
||
[[Category:Solar cooker plans]] |
[[Category:Solar cooker plans]] |
||
Revision as of 17:29, 30 January 2020
|
|
|
Last edited: 14 March 2018
|
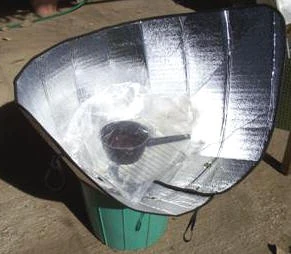
Kathy Dahl-Bredine developed the Windshield Shade Solar Cooker while experimenting with various designs of cookers to introduce in the indigenous communities where Kathy lives and works in southern Mexico. She hit upon an utterly simple way to make an instant portable solar oven by using an automobile windshield shade.
Materials needed
- Reflective accordion-folding car sunshade
- Black pot
- Bucket or cardboard box
- Oven cooking bag
- Cake rack (or wire frame or grill) (optional)
- 12 cm (4.7 in) of Velcro (optional)
Instructions
(Note that the windshield shade can be attached to itself by means other than Velcro.)
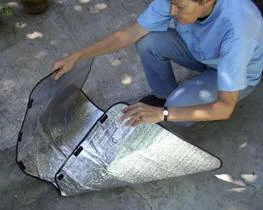
Making the funnel.
- Lay the sunshade out with the notched side toward you, as above.
- Cut the Velcro into three pieces, each about 4 cm (1.6 in) long.
- Stick one half of each piece, evenly spaced, onto the edge to the left of the notch. Attach the matching half of each piece onto the underneath size to the right of the notch, so that they fit together when the two sides are brought together to form a funnel. (I first tried sewing these on a sewing machine, but found it cut through the reflective material.) If using stick-on Velcro, you can align the two pieces easily like this: Stick down one side of the Velcro, then press the two pieces of Velcro together, fold the shade into the funnel shape, and stick down the second side.
- Press the Velcro pieces together and set the funnel on top of a bucket or a round or rectangular plastic wastebasket.
- Place a black pot on top of a square cake rack, placed inside a plastic baking bag. A standard size cake rack in the U.S. is 25 cm (9.9 in). This is placed inside the funnel, so that the rack rests on the top edges of the bucket or wastebasket. Since the sunshade material is soft and flexible, the rack is necessary to support the pot. It also allows the sun's rays to shine down under the pot and reflect on all sides. If such a rack is not available, a wire frame could be made to work as well. Note: The flexible material will squash down around the sides of the rack.
See also Solar Funnel Cooker.
Tips
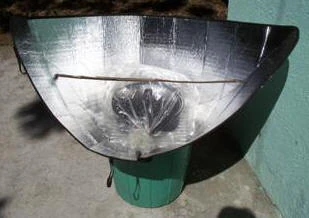

Cooker with stabilizing stick.
- The funnel can be tilted in the direction of the sun.
- A stick placed across from one side of the funnel to the other helps to stabilize it in windy weather (see photo).
- After cooking, simply fold up your “oven” and slip the elastic bands in place for easy travel or storage.
Kathy Dahl-Bredine writes: "I have found this totally simple solar oven extremely practical, as it is so lightweight and easy to carry along anywhere. But in addition, it has reached a higher temperature in a shorter time than all the other models I have experimented with so far (I haven’t used a parabolic) — a little above 177 °C (351 °F). I have cooked black beans in about the same amount of time as on a gas stove; I’ve used it to bake breads, granola, brownies, lasagna, all sorts of vegetables, and to purify water. The sunshade may not be available everywhere, but I suspect it can be found in most urban areas, since I found it here in southern Mexico. The Velcro was also available in fabric stores. The cost of the sunshade was about USD 3.00; the Velcro about 25 cents."
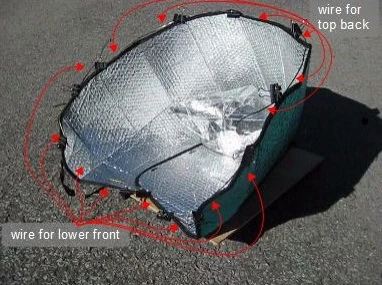
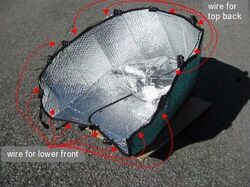
Steven Dufresne offers the suggestion to clip a perimeter wire support around the cooker for reflector support.
It is clear that the windshield-style cooker is somewhat flimsy in any sort of windy conditions. One approach is to tie a horizontal support brace across the front of the cooker. This is often done with something like an untwisted metal coat hanger. A perimeter wire can also be used, held with stationary clips, as seen in the adjoining photo.
Variations
"Super-size" variation

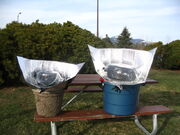
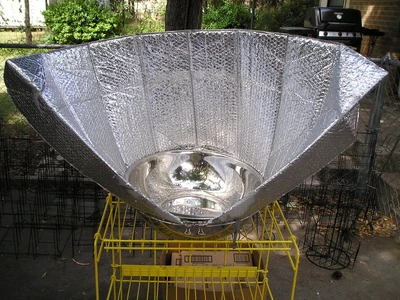
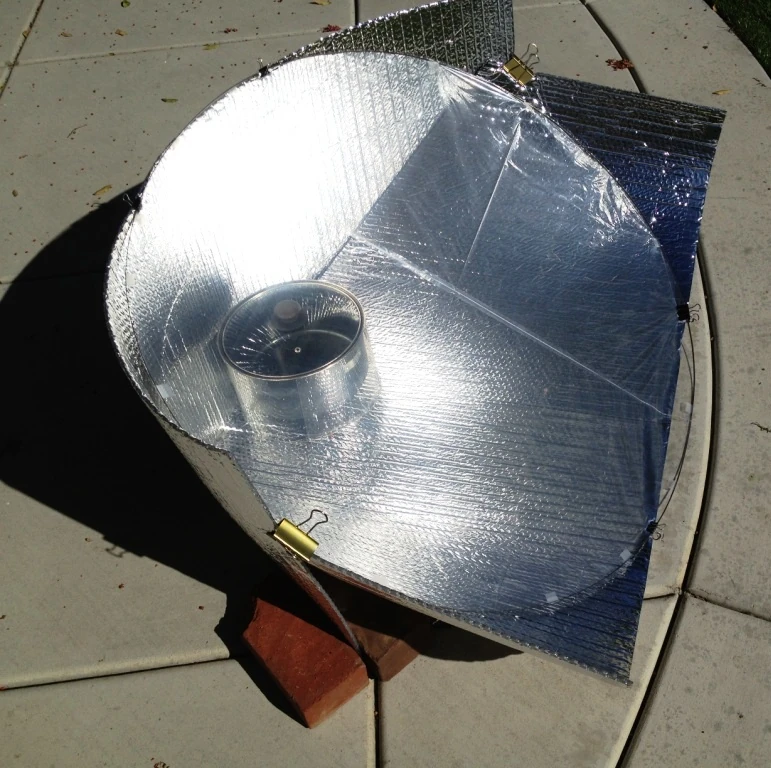
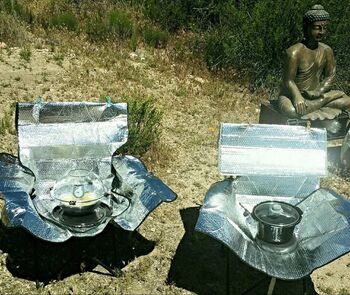
Size comparison between car windshield shade cooker and the super-size version.
Sharon Cousins has come up with a super-size version made from a windshield shade cover sized for a large pickup truck or sport utility vehicle (SUV). The larger size requires something on the order of a tub instead of a bucket for support. The 48 cm (18.9 in) round grate from a broken fan helps hold the windshield shade in the tub and helps maintain the shape. Pots rest on a flat grate laid across the edges of the round grate, which lets a lot of light get under the food.


Close-up of Sharon Cousins's supersize windshield shade cooker showing details of double grate system. Since this photo, Sharon has realized it works just as well to slip the bag over the top and sides of the water boiler, which is much easier than trying to insert the boiler into the bag. Very little heat is lost through the bottom. Just slide it over the top and sides and tuck a bit at the bottom.
This cooker is vulnerable to wind, so put some weight (such as a large rock or two or three) in the tub, and if it is very windy you can also put a few foiled rocks on the grates to help hold it all down. This super-size version can handle up to two gallons of food or up to ten pounds of meat in decent sun. In really good sun, it has gotten a full two-gallon water boiler hot enough for dishwashing (too hot to put a bare hand in) in less than an hour. This cooker gets almost hot enough to sauté and will get smaller amounts of food very hot, very quickly. In one soup stock cooking adventure at the height of summer 2007, a one liter (0.3 gal.) cooking jar stuffed with the bones and skin of a roast chicken, some seasonings, and water with a little wine to fill was set to cook on a glass plate under a glass cover. The contents reached a good boil and fat from the top began boiling over and out of the jar, where it not only continued to boil and bubble on the glass plate under the cover, but also bubbled on the plate outside of the glass cover where it was seeping under the edge! NOTE: The double-grate system will work with a smaller shade, too — usually around 33 cm (13 in) to 36 cm (14.2 in) in diameter is about right for the broken fan grate. (Broken fans are not hard to come by, at least in the developed world.) Double-grating probably gives more benefits to those suncooking in the north than it would closer to the equator, though even close to the equator it will help to cook with early and late sun.
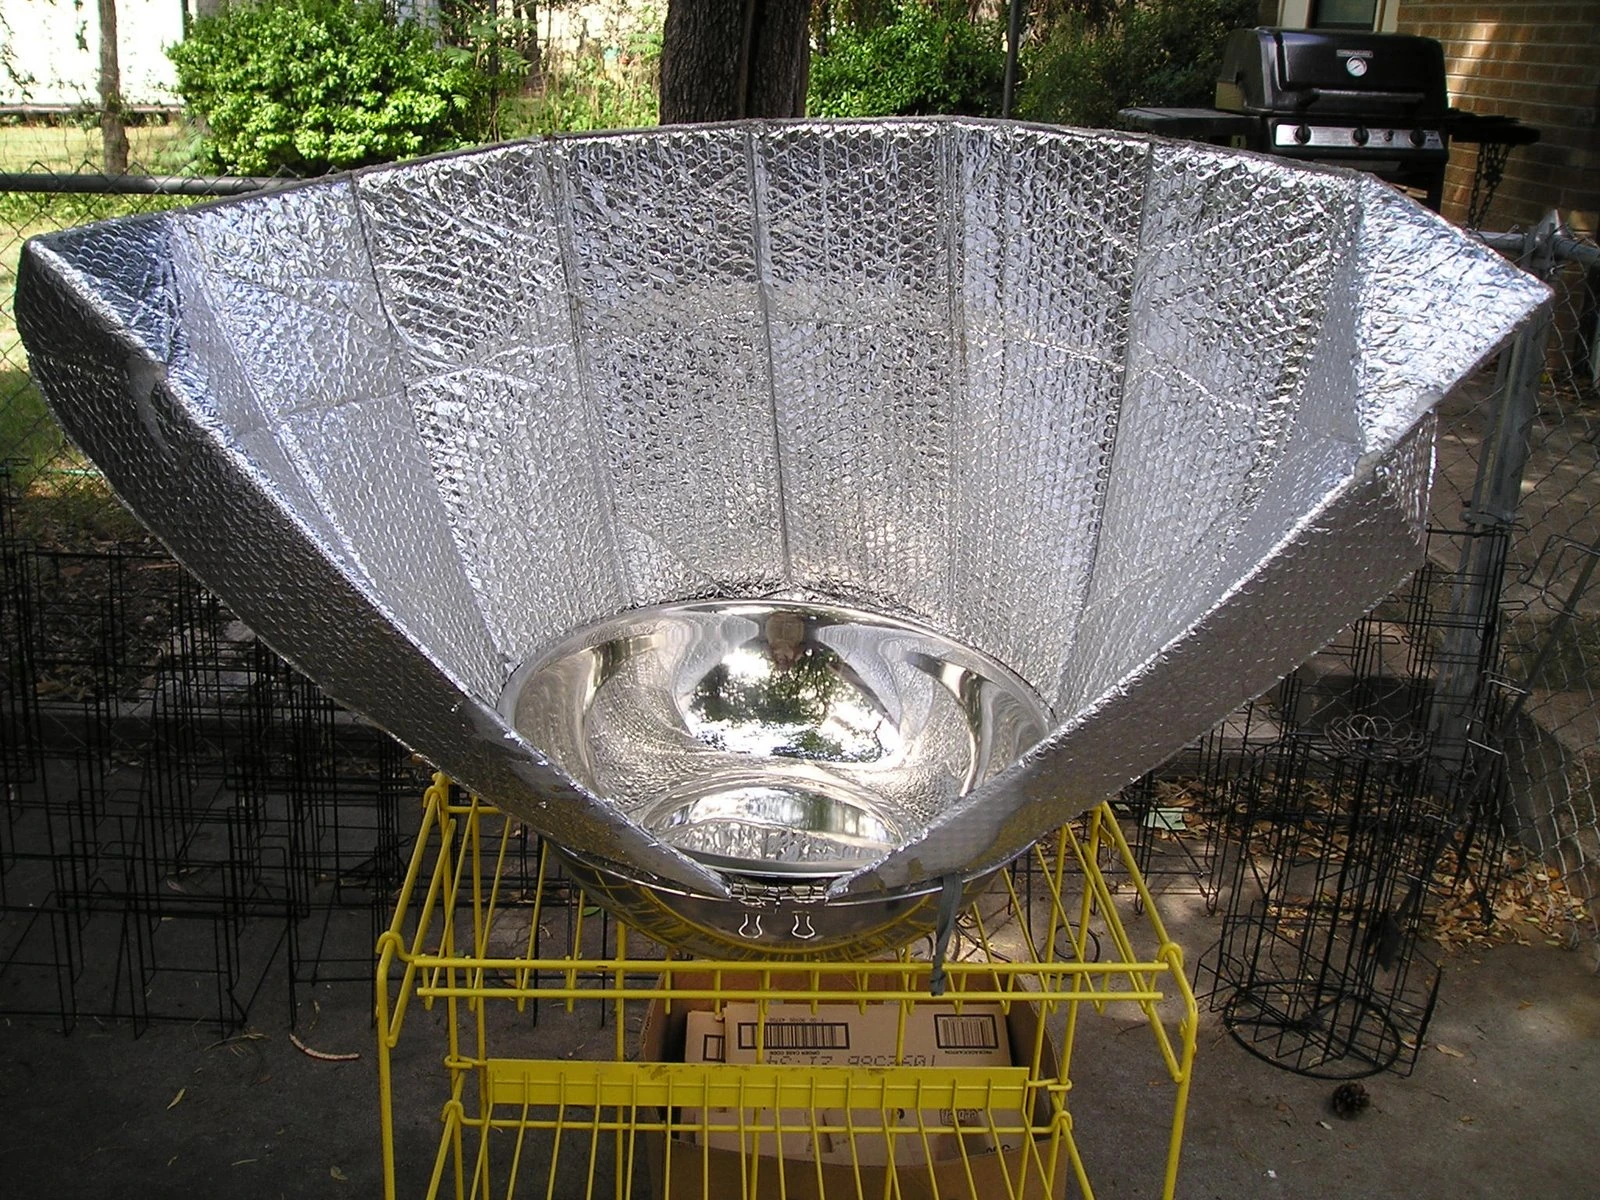
Steel bowl variation
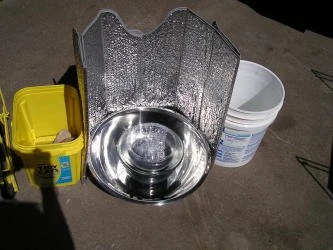
Inside this cooker is a Pyrex pie plate on a short candle stand; a Pyrex bowl is on top. More info: http://arnies-solarcooking.blogspot.com/2008/06/steel-bowl-cooker_22.html

See also Aluminum Roasting Pan Solar Cooker.
Two steel bowl variation
Arnies-Solarcooking blog also came up with this variation that sandwiches the windshield shade between two metal bowls.
UltraLightCooker variation
The UltraLightCooker uses foam panels for support and was designed by Andrew Kotowski. He built this cooker specifically for his trip to Poland. The objective was to build a simple cooker: collapsible, light, cheap, and easy to carry. It is useful for demonstrations and to cook simple meals.
Materials used: Car sunshade and plate of polystyrene (1.5 cm (0.6 in) thick).
Weight: 0.5 kg (1.1 lbs) (no recipient).
See more information on this variation on the French Wiki -.
The Haines variation
- See Haines Solar Cooker.Haines Solar Cooker
Haines Foam Insulation Cooker
- See Haines Foam Insulation Cooker.Haines Foam Insulation Cooker

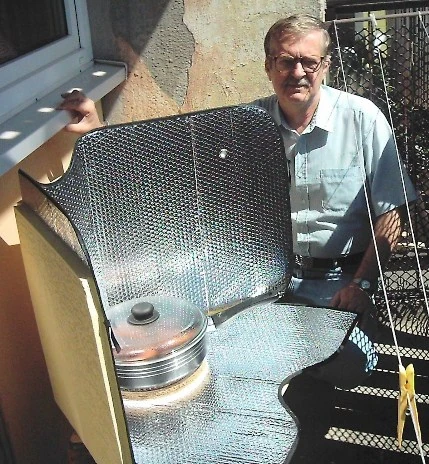
Kettle Cooker variation
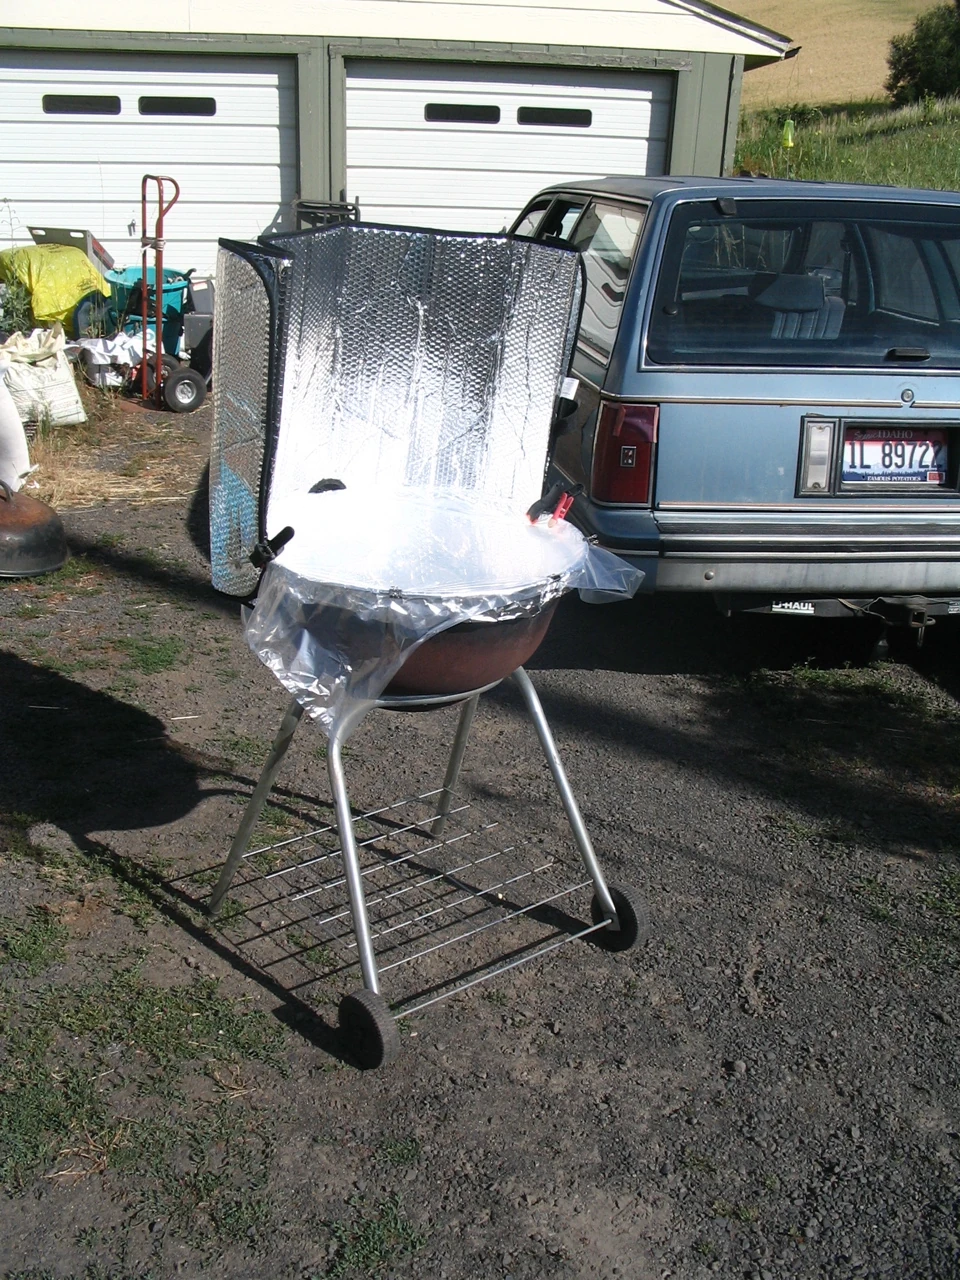
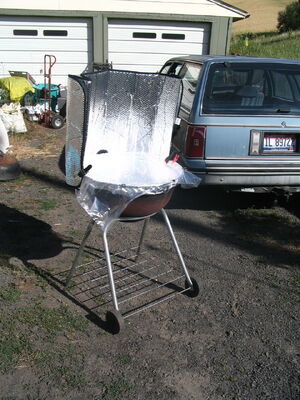
Converted kettle grill cooker meets the sun for the first time.
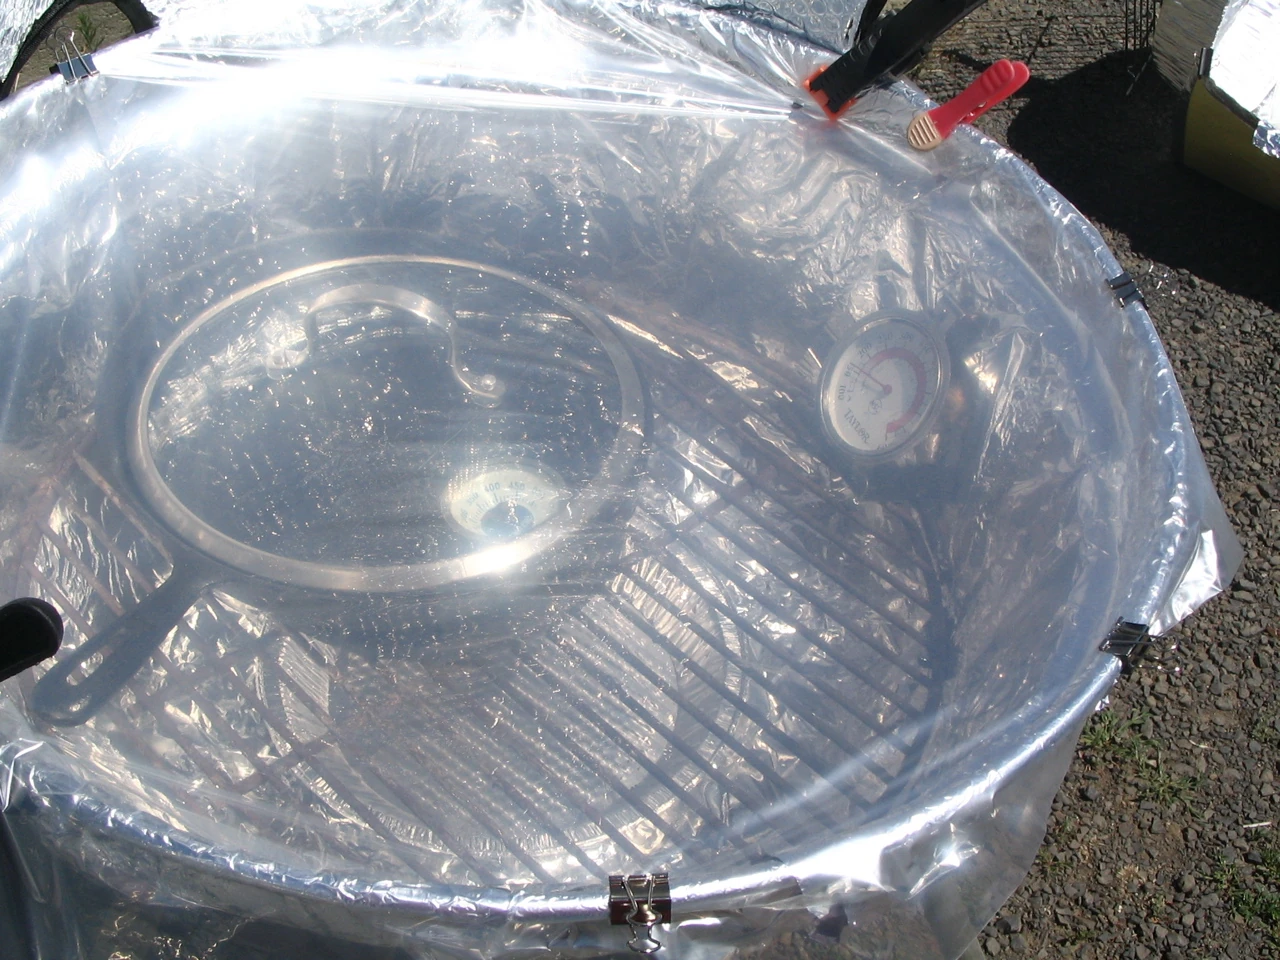
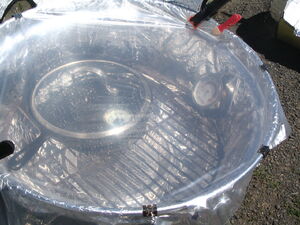
View of top of kettle cooker.
Sharon Cousins built this powerful cooker from an old kettle grill. The addition of a windshield shade reflector at the back makes it a very strong cooker. On its maiden flight, temperatures in the cast-iron fry pan under the glass lid reached 107 °C (225 °F) by 8:30 a.m., 121 °C (250 °F) by 8:45 a.m., and by midafternoon it was running just shy of 163 °C (325 °F). The tilt angle of the reflector can be adjusted to keep the hot spot over the pan. This is a very good cooker for demos, as it can turn out a hot quesadilla or pan of nachos in under ten minutes (slip black plates or shallow pans of nachos into the pre-heated cast-iron fry pan — use an upside down Pyrex pie pan or bowl for a lid if your glass lid is too shallow for a pile of nachos).
A disposable aluminum pie pan is used to close the hole in the bottom of the kettle, and the rest of the kettle is lined with heavy-duty aluminum foil. The fry pan rests on the grill that formerly held the charcoal and is covered with a glass lid from a thrift shop. The top of this kettle is covered with a 61 cm (24 in) x 76 cm (29.9 in) oven bag, available from restaurant supply stores that carry specialty bags such as the Webstaurant Store. It is laid flat, so it is actually a double cover, and held on with binder clips. As shown, the cast-iron pan with glass lid gets very hot, but the ambient air temperature in the kettle is not tremendously hot, so any clear plastic might be worth a try if you do not have access to an extra-large oven bag; or you could cut open two turkey-size bags to get large flat pieces and cross them over the opening, which might work depending on the size of your kettle. Sturdy spring clamps are used to secure the windshield shade and adjust the angle. If you still have the metal cover to your kettle grill and you are in the time of year when you use your kettle cooker almost daily, you can cover your cooker (at least if you used small binder clips, which do not interfere) and leave it out without having to end up with dew residue and excess dust clouding your cooker top. In the morning, just take off the cover, clip on the booster, and let your pan start heating. To perform well, the cast iron must be preheated, so if you're going to use it, the sooner you start it heating the better.
Part of what makes this arrangement so hot is the thermal mass of the cast iron. One attempt to bake bread in it indicates that lighter pans would need to be oven-bagged or otherwise "greenhoused," in addition to the clear cover on top of the kettle. Sharon believes that this cooker will cook in alternative pans, but only with an additional greenhouse around the pan. This is a case where cast iron gives vastly superior performance, but only if it is well preheated.
Sharon has since switched to the poster-board reflector panels (See Aluminum Roasting Pan Solar Cooker and click on the project sheet link for information on making these powerful reflectors) and is reaching temperatures up to 204 °C (399 °F) in the glass-lidded fry pan. This has turned into a terrific cooker for quesadillas, among other things. Sharon is planning to give this cooker its own wiki page as soon as she can make a little more time for it. This jury-rig or makeshift cooker is really a prototype for something that could be groundbreaking, and Sharon would welcome contact and feedback from other solar cooking engineers and innovators on how to maximize its potential.
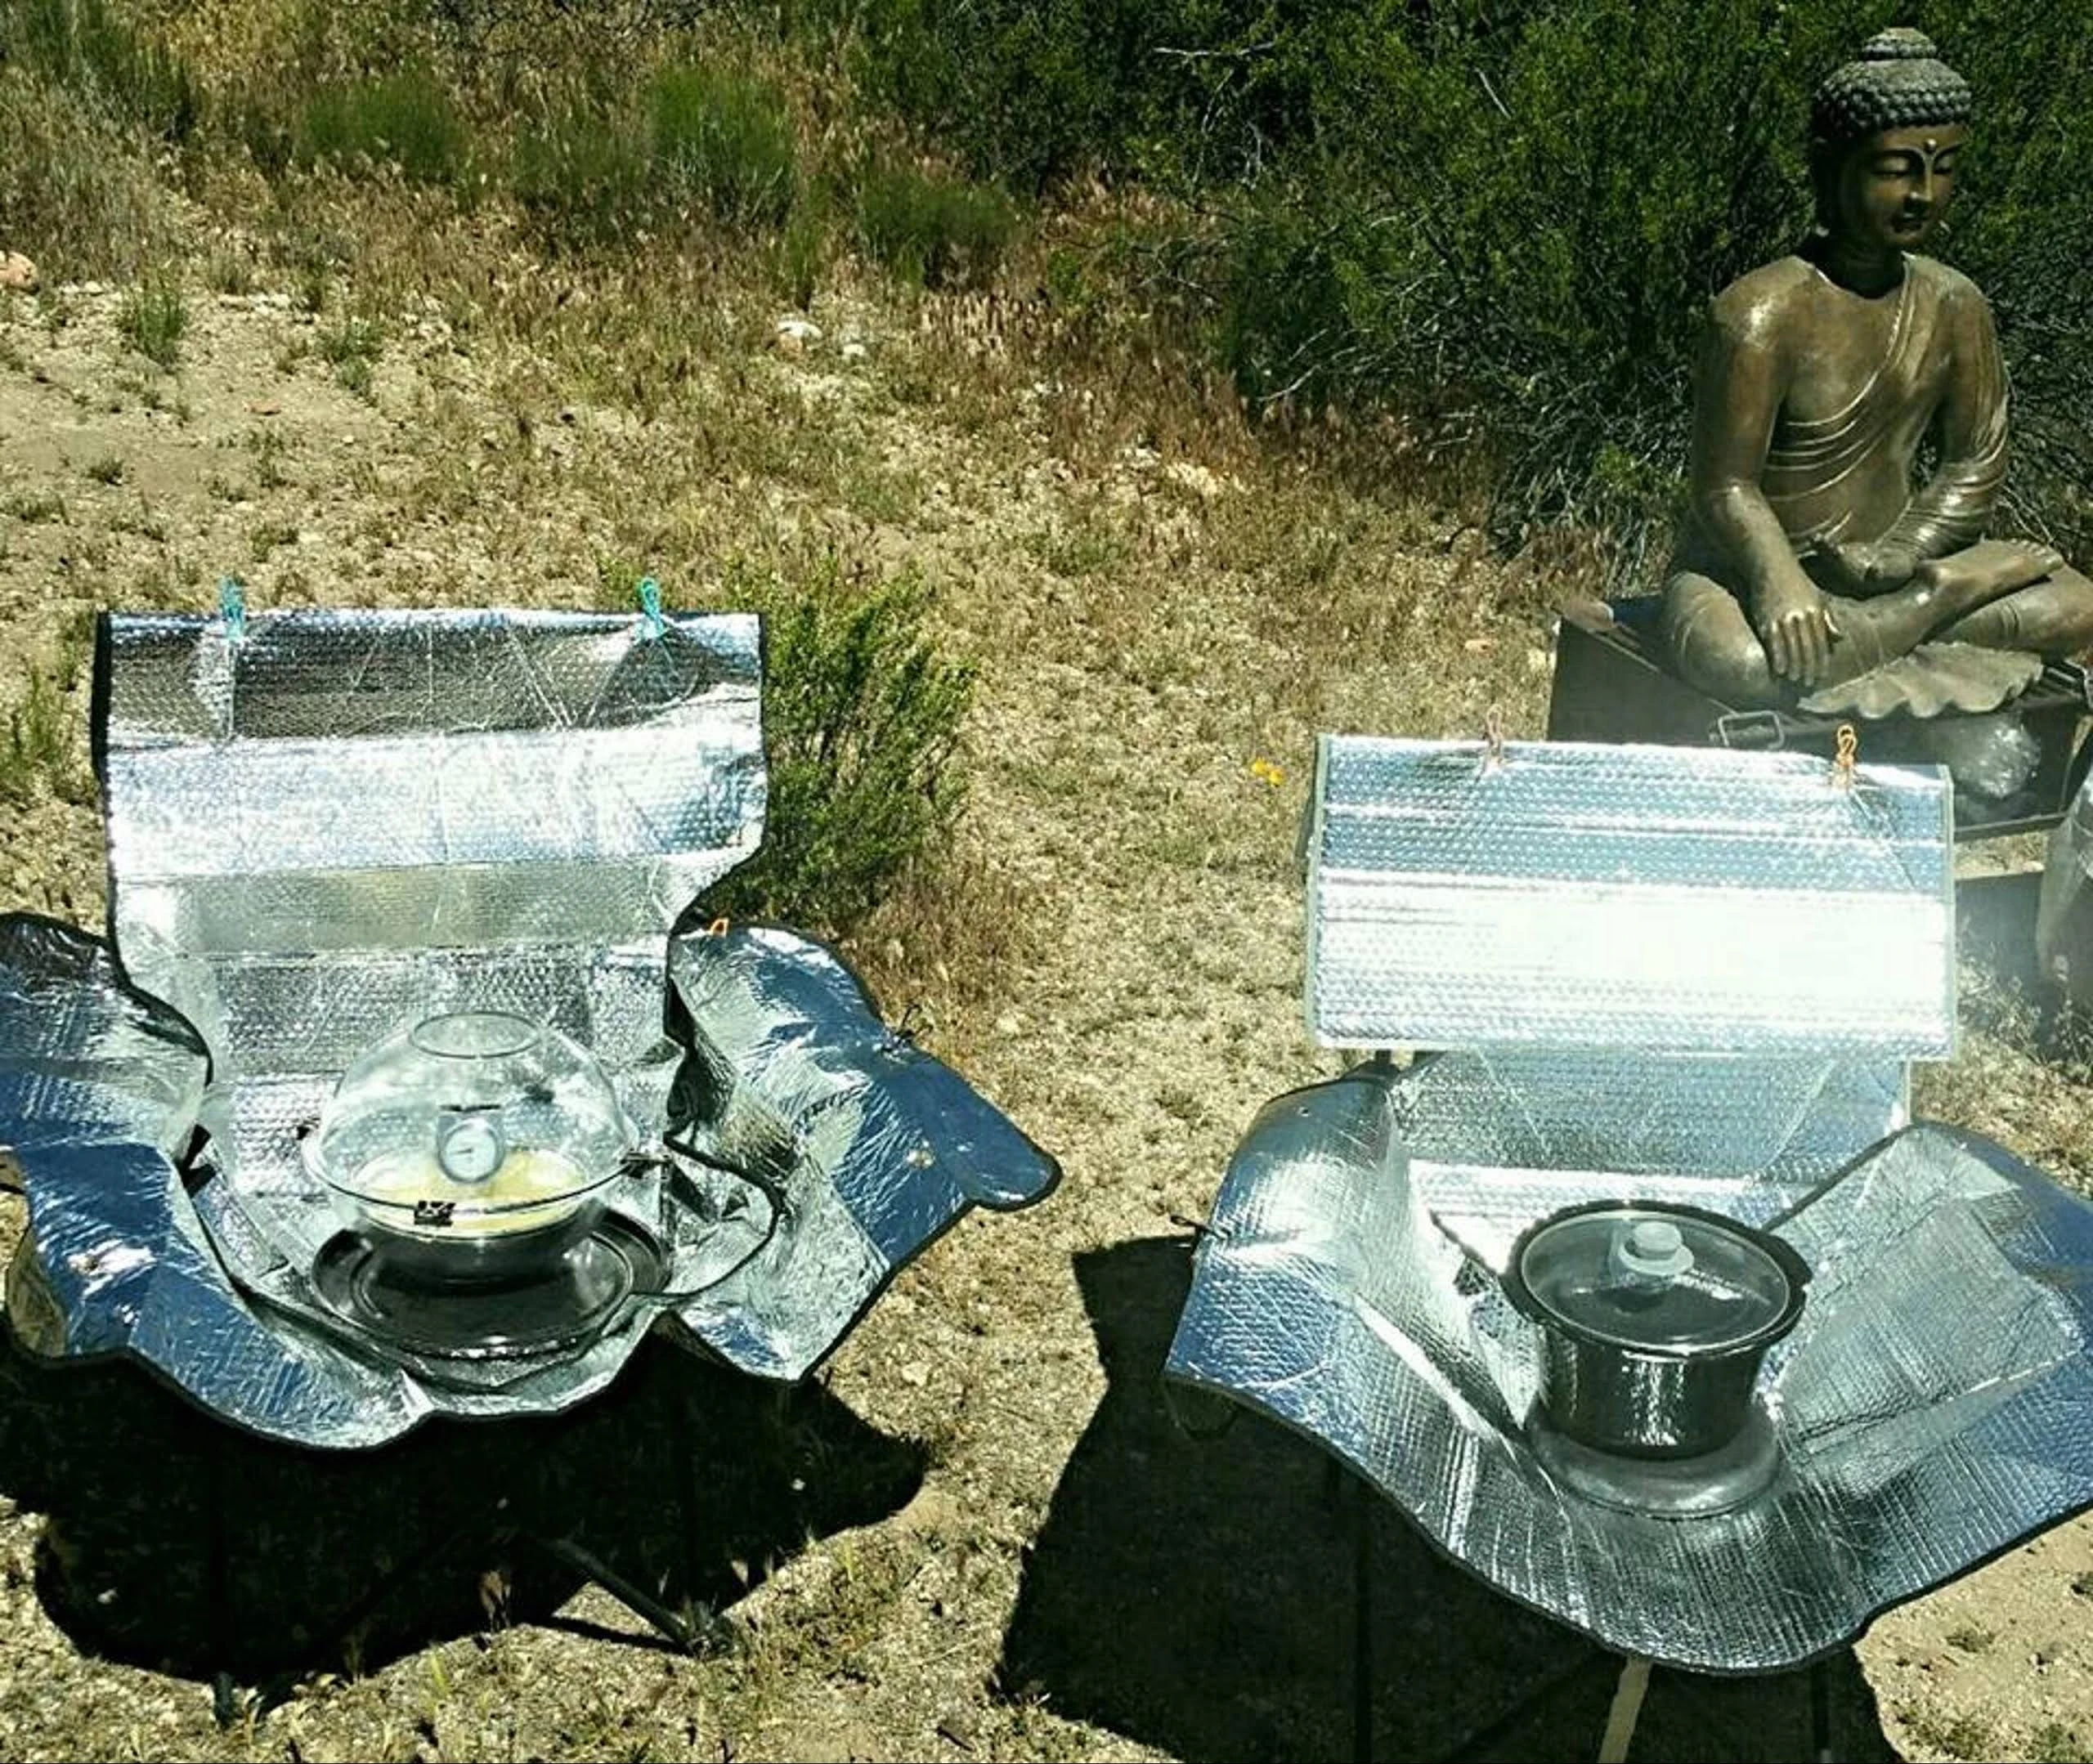
Armando Herculano variations
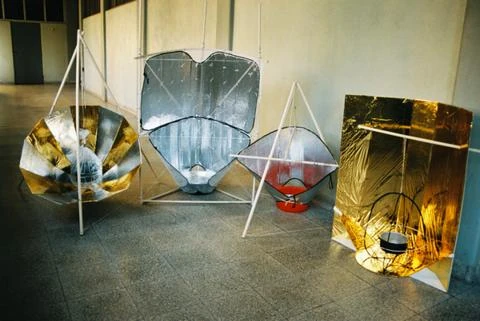
Other designs using windshield shades by Armando Herculano in Portugal.
HVAC insulation variation: 1
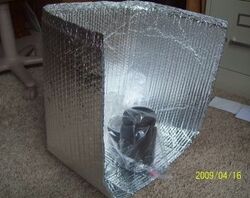
Stacy Ryerson has made a cooker using a material similar to the windshield screens. It is a quilted insulating plastic covered with Mylar (sold on a roll and intended for wrapping heat ducts). However, it differs from the typical windshield screen because it is designed to bend in only one direction. This means it appears to stand vertically on its own without support, except for lateral wind bracing. The windshield screen must bend in two directions to conform with the complex shape of the glass. This allows it to form a funnel shape cooker, but the cooker usually requires additional support aids. This cooker is sturdy and is able to pack flat for transport. The back cardboard panel is shingled with strips of duct tape to make it waterproof.
  HVAC insulation material is sturdy and supports itself. | 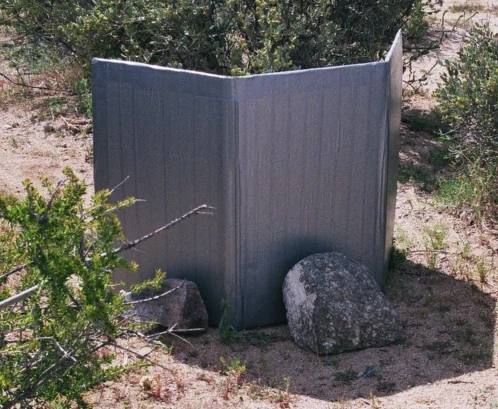  The cooker still needs to be braced in windy conditions. |
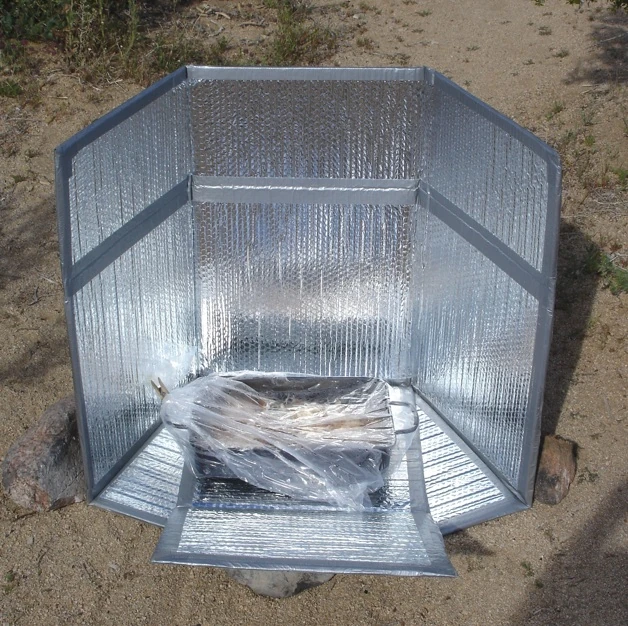
HVAC insulation variation: 2
Solar Cooker at Cantina West offers another inexpensive design possibility using reflective HVAC insulation. The Reflectix bubble insulation can be purchased in a roll (7.5 m x 0.5 m, or 25 ft x 2 ft), allowing you to make several reflective panels; or you can buy a pre-cut length in some home improvement stores. This particular reflector panel is a 1 m x 1.5 m (3 ft x 2 ft) panel. The flat sheet first has a tab cut at the base, which is folded up. The adjacent bottom tabs then fold underneath. The tabs can be secured with various clips available at office supply stores. The edges of the cooker can be covered with reflective tape. A dark-colored pot enclosed in an oven roasting plastic bag sets in the center for cooking. For better heating, it is best to raise the pot up off the reflector with a trivet or small stones or sticks. See more detailed instructions...
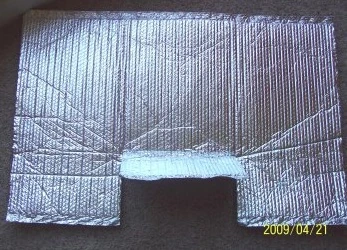  A simple tab is cut at the base of a flat sheet of insulation. |   The tabs at the bottom are folded under each other and clipped together. |
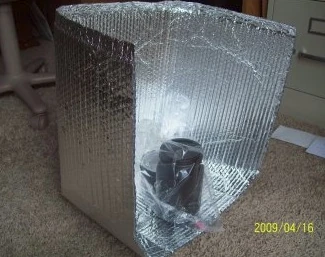
With a pot in a plastic cooking bag you are ready to cook.
Wheelbarrow variation
 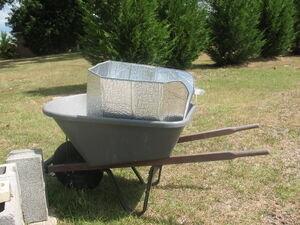 Windshield shield cooker made mobile with a wheelbarrow. | 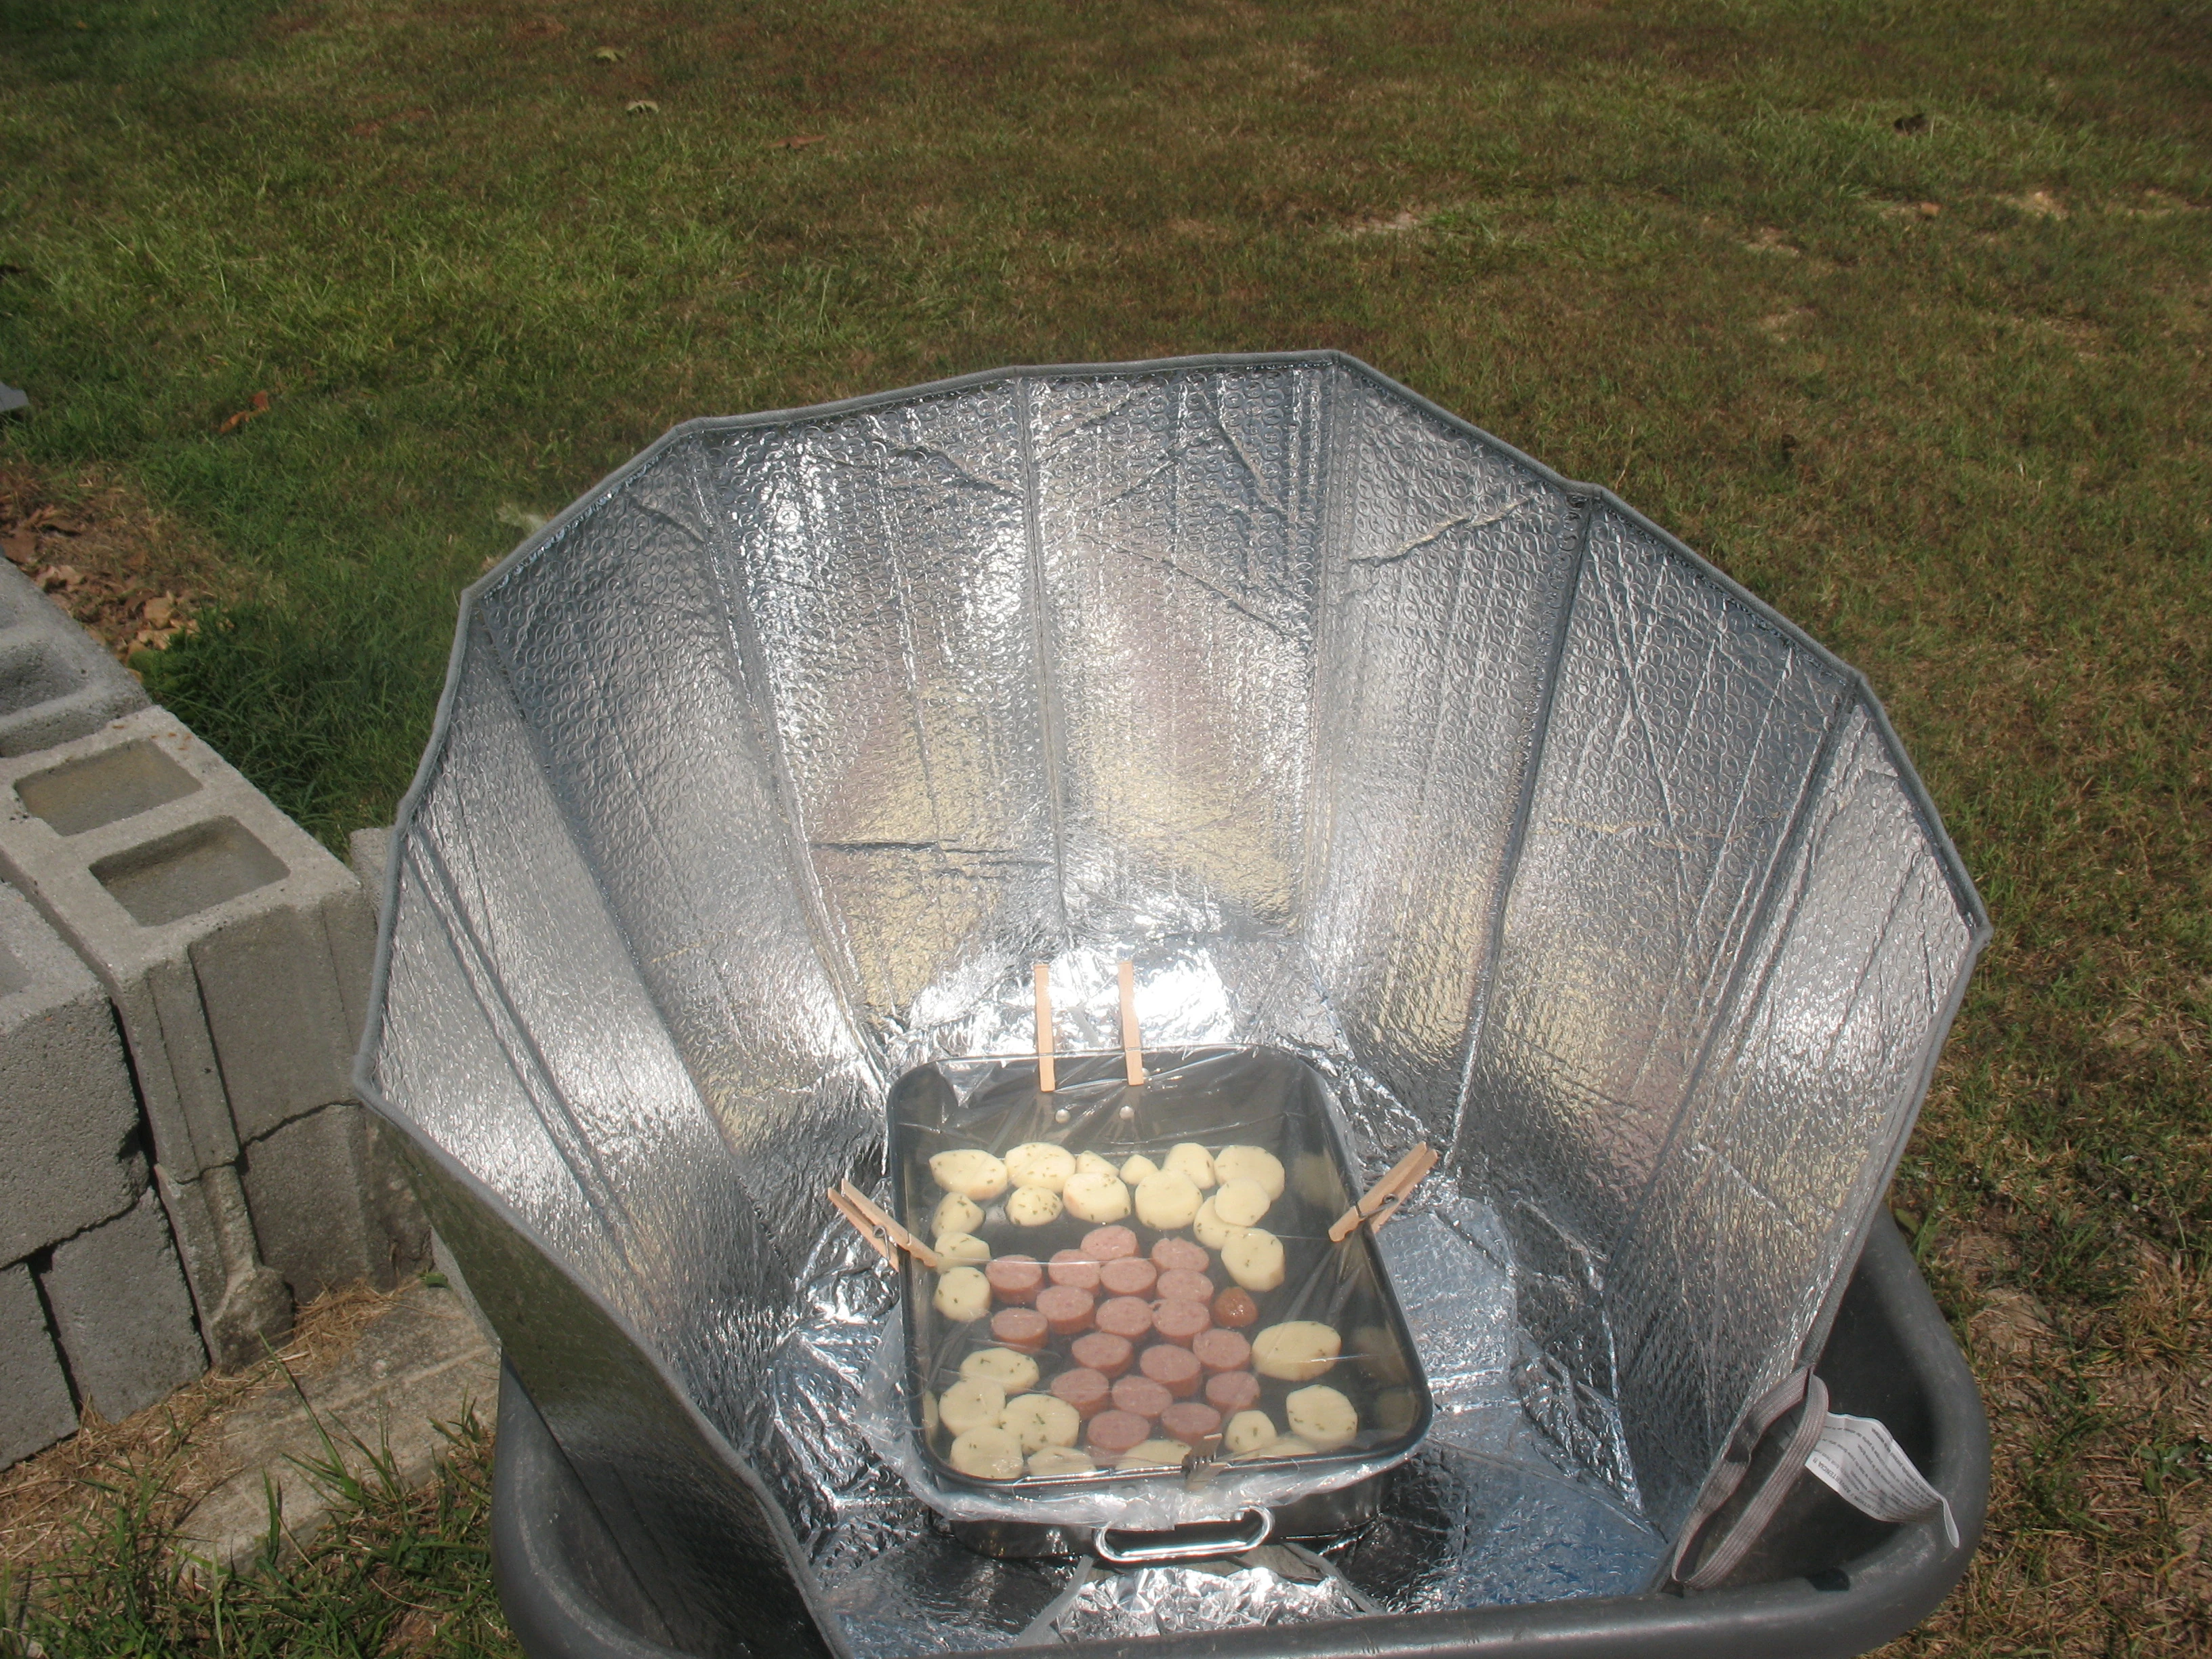  Food cooking in the mobile windshield wheelbarrow cooker. |
Camping chair variation
- May 2017: Your folding camp chair can be used for cooking. Spread windshield shades across the chair as shown in the photo.
Camping chair support for reflector.
Audio and video
- February 2015

- January 2013:
